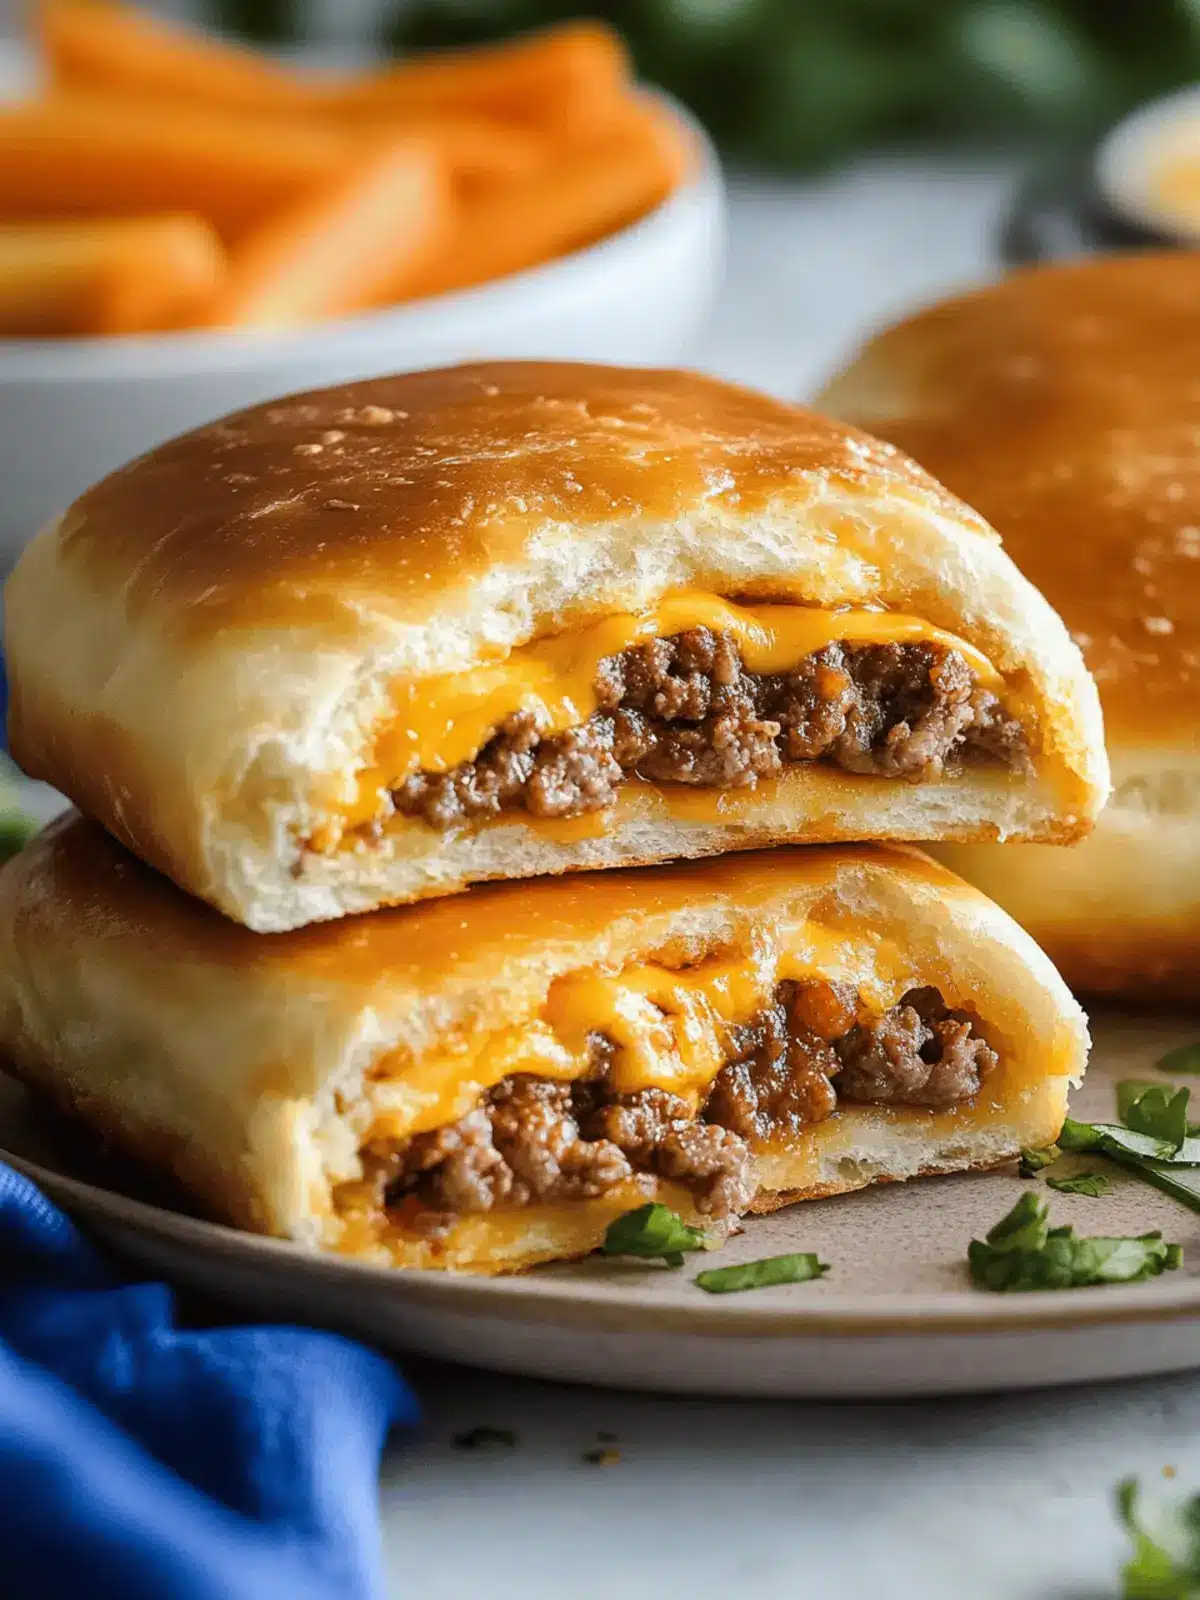
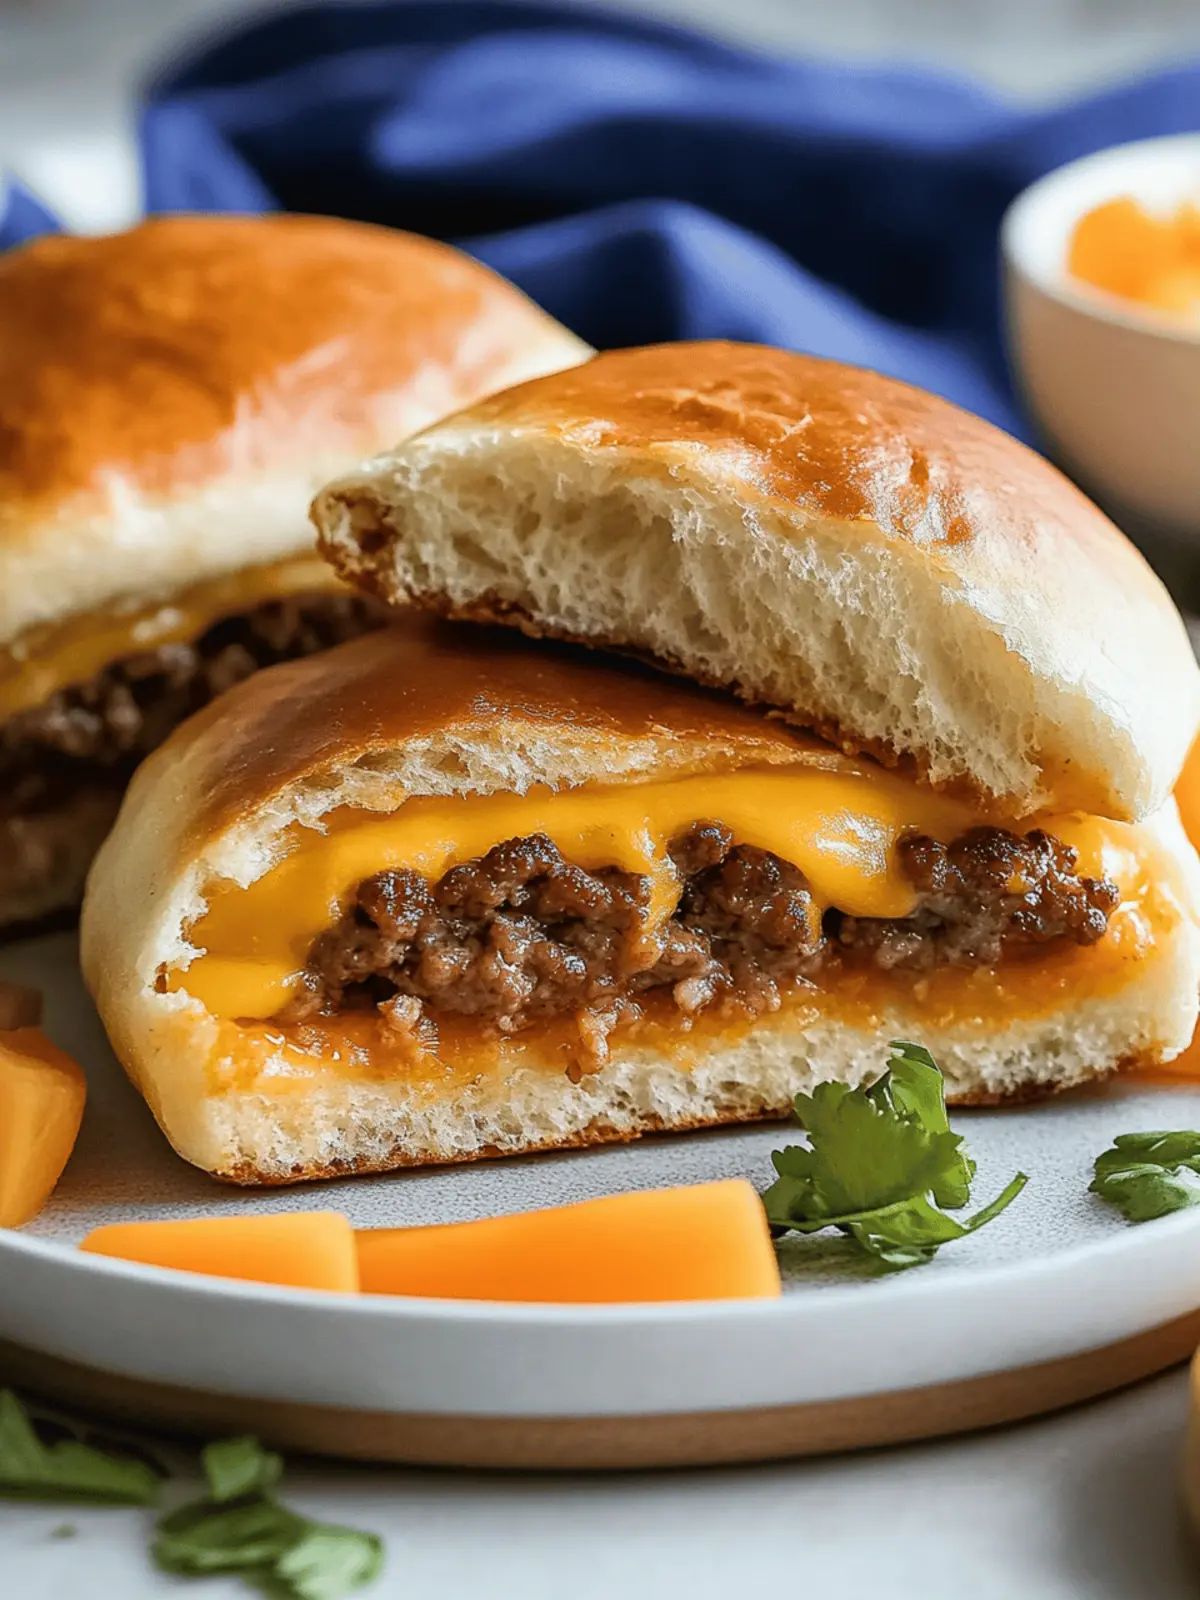
When the craving for something warm and comforting strikes, there’s nothing quite like biting into a flaky, golden crust filled with savory goodness. That’s where my Easy Cheeseburger Pockets come into play! These delightful pockets are bursting with seasoned ground beef, zesty ketchup, and gooey melted cheese, all wrapped in a conveniently portable pizza crust.
Picture this: a busy weeknight when dinner needs to be on the table in a flash, or a picnic where you want a meal that travels well. These cheeseburger pockets are the perfect solution—quick to prepare and guaranteed to satisfy every member of the family. Whether you’re hosting a casual gathering or simply need a delicious lunch to grab on the go, this recipe brings the joy of a classic cheeseburger in every handheld bite. Get ready to elevate your mealtime with these scrumptious pockets that are as easy as they are delightful!
Why love Cheeseburger Pockets?
Simplicity at its Best: These Cheeseburger Pockets are incredibly easy to make, perfect for even the busiest cooks!
Family-Friendly Fun: Everyone in your family—kids and adults alike—will love these savory pockets, making them an instant crowd-pleaser.
Portable Pleasure: Enjoy these pockets on-the-go, whether for a school lunch or a picnic, that won’t sacrifice flavor for convenience.
Flavor Explosion: The combination of seasoned beef, cheese, and the crispy crust creates a mouthwatering experience in every bite, reminiscent of your favorite cheeseburger.
Make-Ahead Magic: These pockets can be prepped ahead of time, stored in the fridge, or even frozen for a quick meal solution anytime.
Cheeseburger Pockets Ingredients
Get ready to make some delicious Cheeseburger Pockets that your whole family will love!
For the Dough
- Refrigerated Pizza Crust – A quick and easy base for your pockets; whole grain options add a healthier twist.
For the Filling
- Lean Ground Beef – The star protein in this recipe; swap it with ground turkey or plant-based meat for a lighter option.
- Onion (Diced) – Adds depth of flavor and moisture; yellow or sweet onions enhance the filling perfectly.
- Black Pepper – Provides a subtle kick; adjust the amount based on your heat preference.
- Ketchup – Adds a sweet and tangy flavor; consider using barbecue sauce for a fun twist.
- Mustard – Brightens the flavor profile; feel free to omit if you prefer a milder taste.
- Shredded Cheese – Melts to create a creamy texture; Cheddar or American cheese are fantastic choices for this filling.
For Baking
- Olive Oil – A light brush over the pockets before baking gives them that golden, crispy finish.
How to Make Cheeseburger Pockets
-
Prepare Filling: In a skillet, brown the ground beef along with diced onion and black pepper. Stir in ketchup and mustard until well combined. (Tip: Let this mixture cool for easier handling.)
-
Preheat Oven: Set your oven to 425°F (220°C) and lightly spray a baking sheet with non-stick cooking spray to prevent sticking.
-
Roll and Cut Dough: Unroll the refrigerated pizza crust on the prepared baking sheet, forming a rectangle of approximately 14”x10”. Cut it into six equal sections.
-
Assemble Pockets: Spoon ¼ cup of the beef mixture and 1 tablespoon of cheese into the center of each dough section. Fold the dough over to form pockets and pinch the edges to seal securely.
-
Bake: Arrange the pockets on the baking sheet and bake for 12-15 minutes, or until they’re golden brown. Brush them with olive oil and return to the oven for an extra minute for a lovely glaze.
-
Serve: Plate your Cheeseburger Pockets warm with a side of fresh salad or fruits to round out your meal.
Optional: Pair with a dipping sauce like ranch or BBQ for an extra tasty touch.
Exact quantities are listed in the recipe card below.

How to Store and Freeze Cheeseburger Pockets
Room Temperature: Keep baked cheeseburger pockets at room temperature for up to 2 hours. After that, to maintain freshness, they should be refrigerated or frozen.
Fridge: Store leftover cheeseburger pockets in an airtight container in the fridge for up to 3 days. Reheat in the oven or microwave until warmed through.
Freezer: Freeze unbaked cheeseburger pockets by placing them on a baking sheet until solid, then transfer to a freezer-friendly bag for up to 3 months. Bake from frozen, adding a few extra minutes to the cooking time.
Reheating: When reheating cooked pockets, pop them in the oven at 350°F (175°C) for about 10-15 minutes for that crispy texture or microwave on medium until heated through, around 1-2 minutes.
Cheeseburger Pockets Variations
Feel free to get creative and customize your Cheeseburger Pockets with these delightful variations!
- Turkey Swap: Substitute ground beef for lean ground turkey for a lighter dish. The flavors still shine through, making it a healthier alternative.
- Vegetarian Delight: Use plant-based ground meat or lentils for a delicious vegetarian option that’s packed with flavor and protein.
- Cheesy Additions: Experiment with different cheeses like mozzarella or pepper jack for an extra kick of flavor that your taste buds will love!
- Spicy Twist: Add diced jalapeños or a splash of hot sauce to the beef mixture for a zesty kick that’ll warm you up!
- Veggie Boost: Toss in diced bell peppers or mushrooms into the filling for added nutrition and texture that everyone will enjoy.
- BBQ Flavor: Swap out ketchup for barbecue sauce for a sweet and tangy flavor profile that takes your pockets to the next level.
- Herb Infusion: Mix in fresh herbs like parsley or cilantro to the filling, tempting your senses with an aromatic experience in every bite.
- Crunchy Surprise: Serve your pockets with crispy coleslaw on the side for a refreshing contrast and delightful crunch alongside the warm, cheesy goodness.
Make Ahead Options
These Cheeseburger Pockets are perfect for busy home cooks looking to save time! You can prepare the filling (ground beef, onions, ketchup, and mustard) up to 3 days in advance by storing it in an airtight container in the refrigerator. Additionally, you can assemble the pockets without baking and keep them covered in the fridge for up to 24 hours before cooking. To maintain the quality, ensure an airtight seal on the pockets to prevent moisture loss. When you’re ready to enjoy your delicious Cheeseburger Pockets, simply preheat the oven and bake them from the fridge, adding an extra minute if they are cold. This way, you can enjoy a homemade meal with minimal effort on those busy weeknights!
Tips for the Best Cheeseburger Pockets
-
Chill the Filling: Let the beef mixture cool for a few minutes before assembling to prevent the dough from tearing during sealing.
-
Seal Tight: Pinch the edges of the dough firmly to ensure the pockets are well-sealed, avoiding spills while baking.
-
Experiment with Cheese: Don’t be afraid to try different types of cheese; mozzarella or pepper jack can add unique flavors to your cheeseburger pockets.
-
Keep it Fresh: If you’re making these in advance, store unbaked pockets in the fridge or freeze them for a quick meal later, saving time without sacrificing taste.
-
Bake Perfectly: Watch closely while baking to achieve that beautiful golden brown—every oven is slightly different, so keep an eye on your cheesy creations!
What to Serve with Cheeseburger Pockets?
Complete your meal with delightful sides that contrast beautifully with the savory pockets.
-
Crispy French Fries: Perfectly seasoned fries add a satisfying crunch and a familiar flavor, just like a classic burger combo.
-
Fresh Garden Salad: A mix of greens, cherry tomatoes, and cucumbers offers a refreshing crunch that balances the hearty pockets.
-
Sweet Potato Wedges: Their natural sweetness, combined with a little sea salt, enhances the savory flavor of the cheeseburger pockets.
-
Coleslaw: This creamy, tangy side adds a cool, crunchy element that perfectly complements the warm, cheesy filling.
-
Fruit Salad: A colorful blend of seasonal fruits brings a sweet and refreshing contrast, making every bite feel light and vibrant.
-
BBQ Sauce for Dipping: Offering a smoky, tangy flavor, dipping your pockets will take these to new delicious heights!
-
Iced Tea or Lemonade: A cool, refreshing drink adds a perfect touch for those busy dinners or picnics.

Cheeseburger Pockets Recipe FAQs
What kind of pizza crust should I use for Cheeseburger Pockets?
You can use any refrigerated pizza crust you prefer, but I recommend whole grain for a healthier option. If you’re feeling adventurous, try making your own!
How long can I store Cheeseburger Pockets in the fridge?
Cooked Cheeseburger Pockets can be stored in an airtight container in the refrigerator for up to 3 days. Just reheat them in the oven or microwave until warmed through for a tasty quick meal!
Can I freeze Cheeseburger Pockets before baking?
Absolutely! To freeze, arrange the unbaked pockets on a baking sheet and freeze them until solid. Once frozen, transfer them to a freezer-safe bag and store for up to 3 months. When ready to enjoy, bake directly from frozen, adding a couple of extra minutes to the cook time.
What should I do if my dough tears while assembling?
If the dough tears, don’t worry! You can take a small piece of excess dough from another section and patch it over the tear. Just make sure to seal it well to prevent any filling from leaking out during baking.
Are Cheeseburger Pockets suitable for those with gluten allergies?
While the traditional recipe uses pizza dough that contains gluten, you can easily adapt it by using gluten-free pizza dough available at many grocery stores. Just make sure to follow the instructions on the packaging for the best results!
Can I use other ingredients in my Cheeseburger Pockets?
Yes! Feel free to get creative! You can swap ground beef for ground turkey or a plant-based substitute. You can also add finely diced bell peppers, mushrooms, or even top with your favorite sauces like ranch or BBQ for a flavor twist!
Cheeseburger Pockets: Your Family's New Favorite On-the-Go Meal
Ingredients
Equipment
Method
- Prepare Filling: In a skillet, brown the ground beef along with diced onion and black pepper. Stir in ketchup and mustard until well combined. (Tip: Let this mixture cool for easier handling.)
- Preheat Oven: Set your oven to 425°F (220°C) and lightly spray a baking sheet with non-stick cooking spray to prevent sticking.
- Roll and Cut Dough: Unroll the refrigerated pizza crust on the prepared baking sheet, forming a rectangle of approximately 14”x10”. Cut it into six equal sections.
- Assemble Pockets: Spoon ¼ cup of the beef mixture and 1 tablespoon of cheese into the center of each dough section. Fold the dough over to form pockets and pinch the edges to seal securely.
- Bake: Arrange the pockets on the baking sheet and bake for 12-15 minutes, or until they’re golden brown. Brush them with olive oil and return to the oven for an extra minute for a lovely glaze.
- Serve: Plate your Cheeseburger Pockets warm with a side of fresh salad or fruits to round out your meal.

